Clonezilla

The Free and Open Source Software for Disk Imaging and Cloning
Clonezilla Live Doc
Print all this session
Disk to disk clone : Clone small disk to larger disk (e.g. 20 GB to 60 GB) (Step by step)
  1. Prepare Clonezilla live
  2. Boot your Clonezilla live via USB
  3. Choose "ToRAM" option in the boot menu
  4. Choose language
  5. Choose keyboard layout
  6. Choose "Start Clonezilla"
  7. Choose "disk_to_local_disk"
  8. Choose source disk
  9. Choose target disk
  10. Start cloning
  11. Disk is cloned
Start cloning
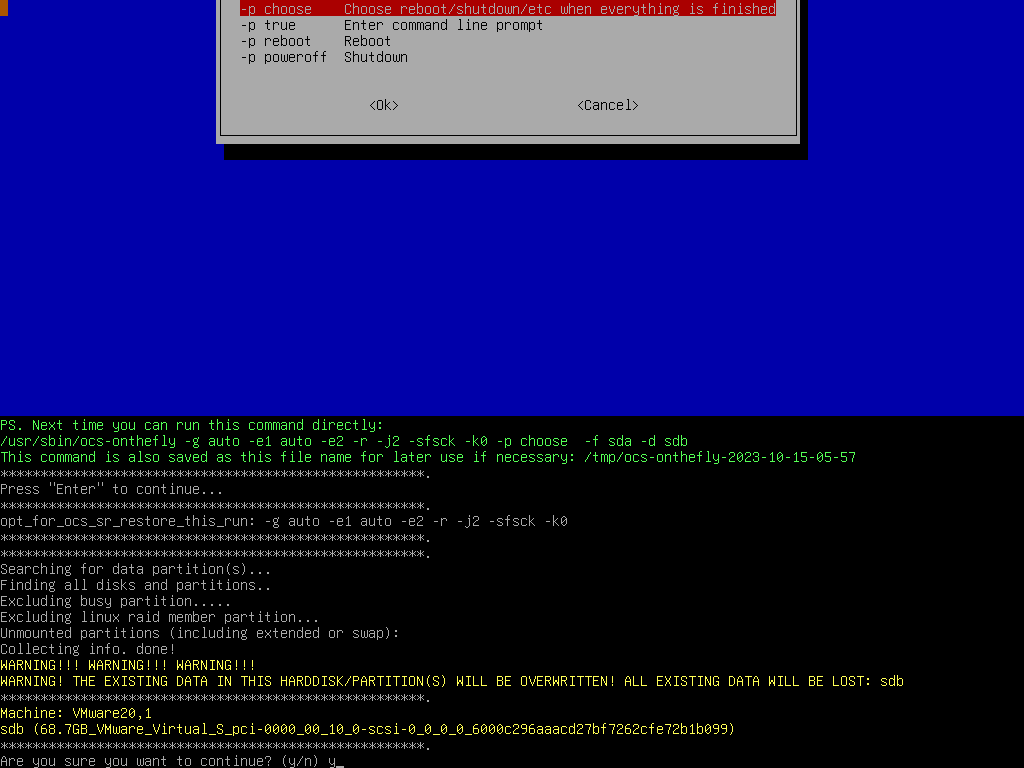
Before doing the real cloning, Clonezilla will ask confirmation:


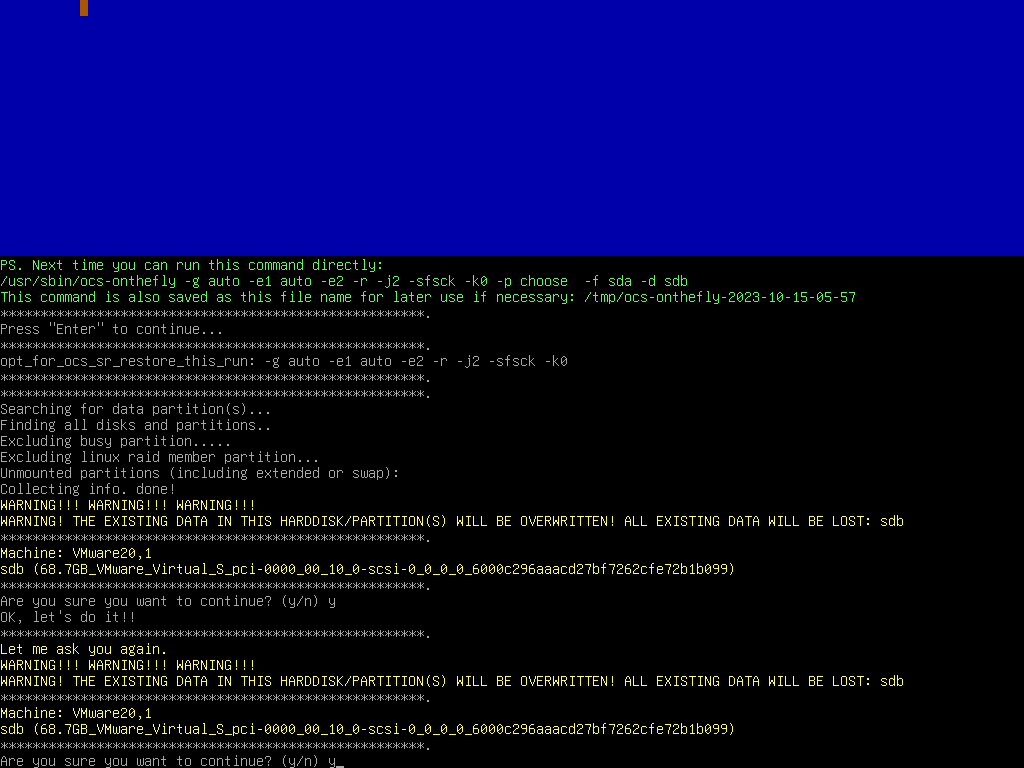
Ask confirmation agin:


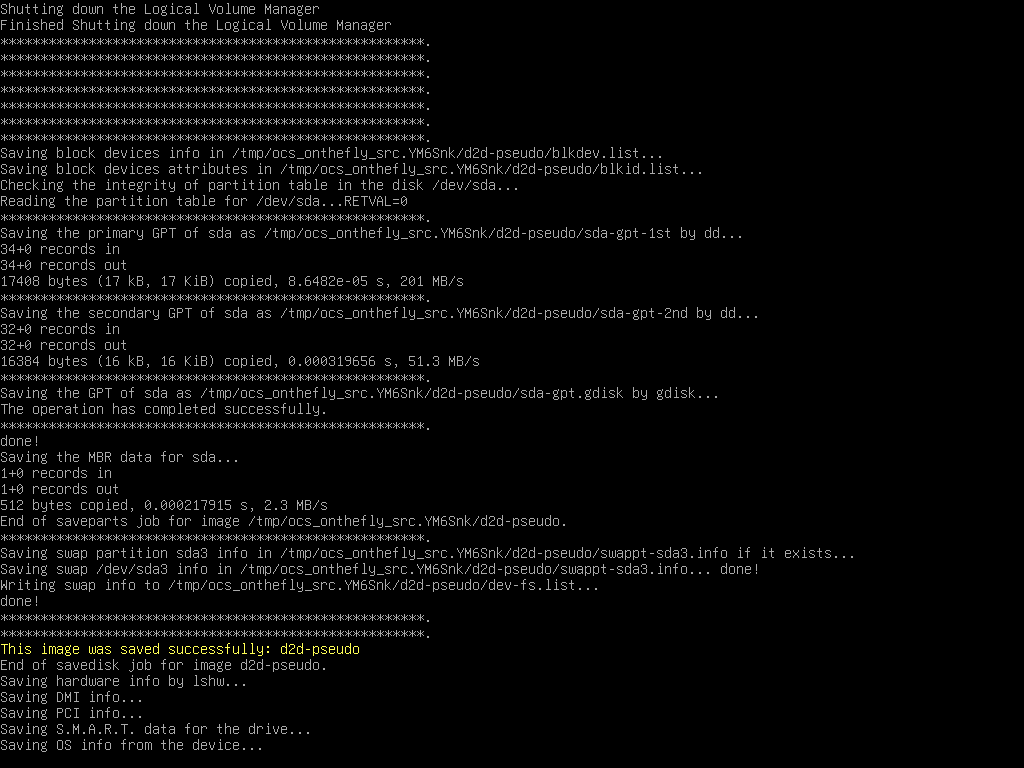
Now Clonezilla starts cloning, first it will prepare a pseudo image of source disk:


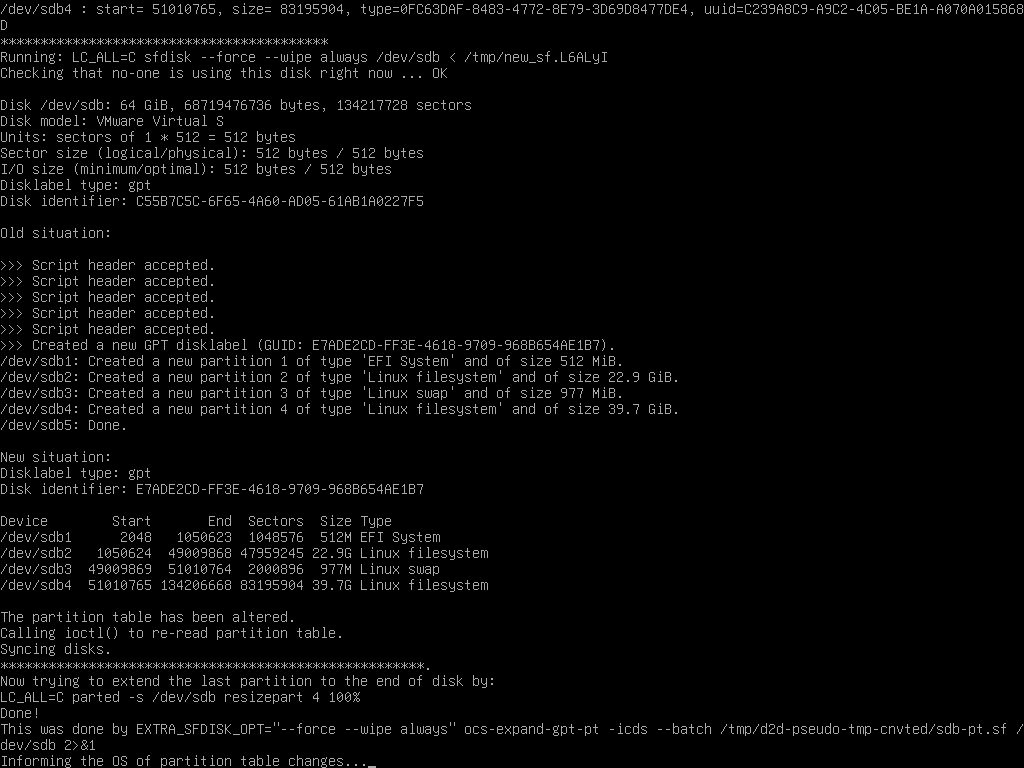
Then Clonezilla creates partition table on the destination disk:


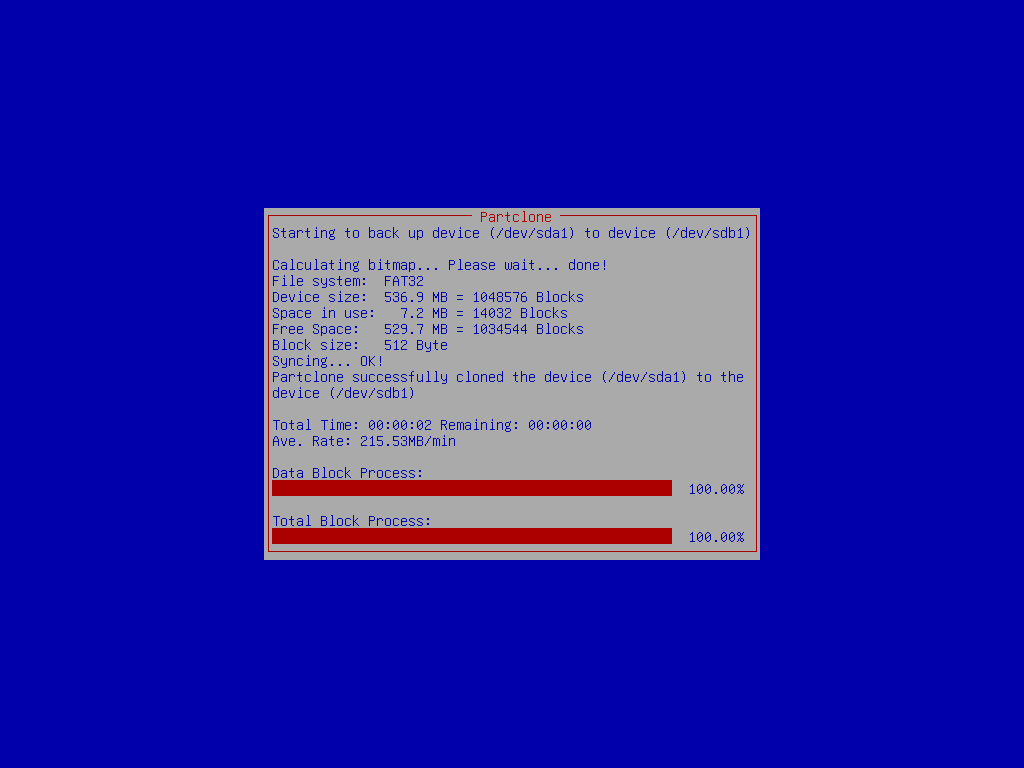
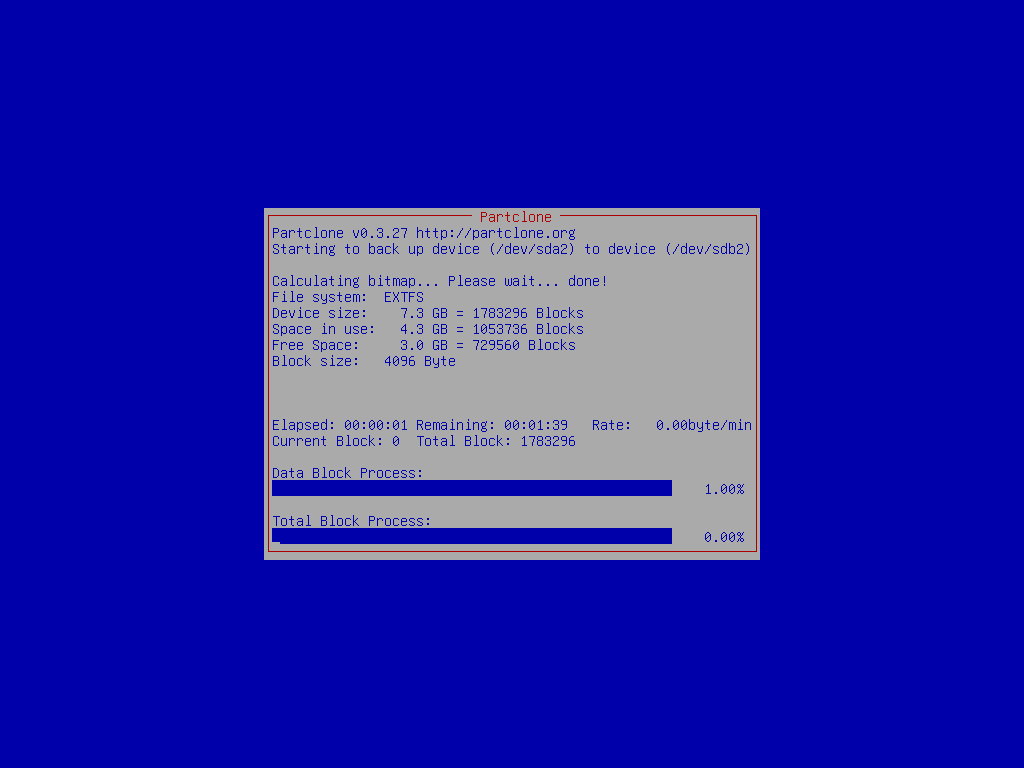
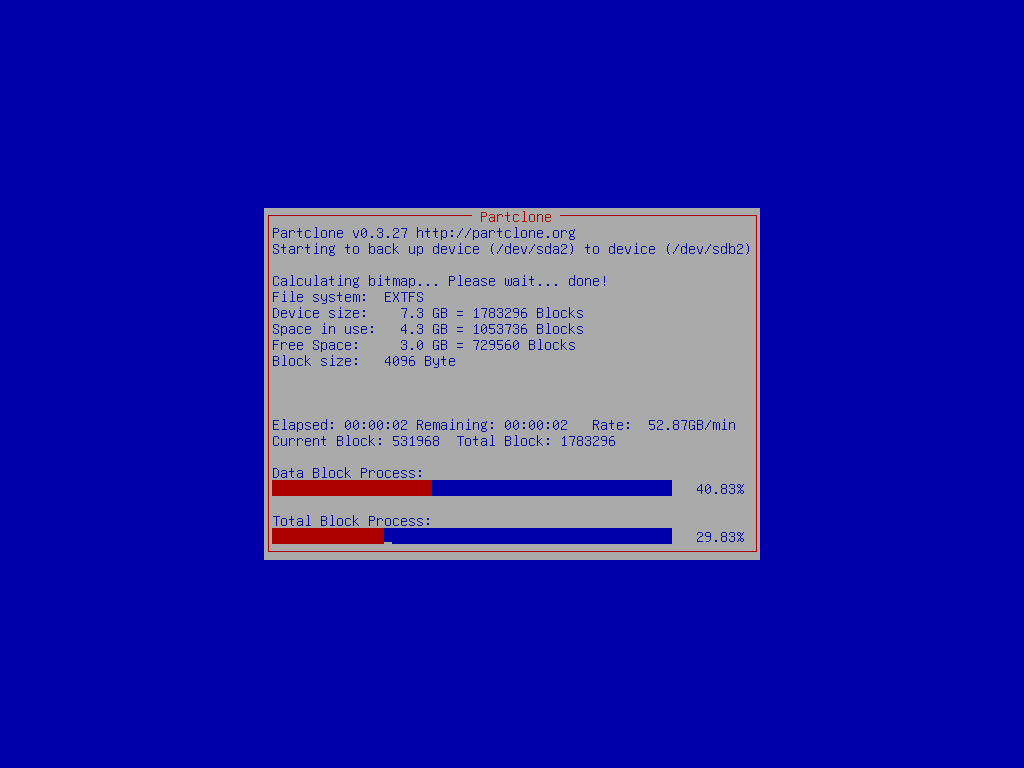
Clonezilla is cloning the data from source disk to destination disk:


Print this page
Clonezilla project. All Rights Reserved. Anyone is permitted to copy and distribute verbatim copies of this document under the terms of the GNU FDL Free Documentation License.